Instant Events Sync from Salesforce to Mailbox
For users of the Email Sidebar on:


2 min read
One of the features included in the Revenue Grid Salesforce managed package is the instant down-sync of calendar items from Salesforce to MS Outlook. This feature can be enabled upon request to the RG support team.
After installing Revenue Grid managed package in an Org, admin must configure the instant calendar Events down-syncing from Salesforce to email client should separately as described in this article. This feature works for MS Exchange or Office 365 mailboxes connected over EWS or MS Graph as well as for Gmail boxes.
This features enables RG Email Sidebar end users to auto-sync newly created Salesforce Events with email client’s calendar in real time. Note that this intant syncing is triggered only on Salesforce Events creation.
After being created, the calendar item is down-synced to the user’s MS Outlook calendar within several minutes. Usually within 5 minutes; however, this interval can be adjusted to match your org’s needs by submitting a corresponding request to the RG support team.
Note
By default, the refresh token for this feature expires in 30 days after the connection. Thus the Connection refreshment procedure should be performed every 30 days. If your Org requires, the refresh token expiration period can be prolonged by sending a corresponding request to our support team
Install Revenue Grid Salesforce managed package
To use this feature, you must have the latest Revenue Grid package installed in your Salesforce org.
You can get the latest version of the managed package here:
https://login.salesforce.com/packaging/installPackage.apexp?p0=04tKW000000cCoS
The Publisher name of the package InvisibleCRM is an old brand name of Revenue Grid.
Tip
Consult this article for more details on installing and configuring the managed package
Add the Custom Setting “ClientID“
Note
For performing this step, request “ClientID” from RG support team in advance
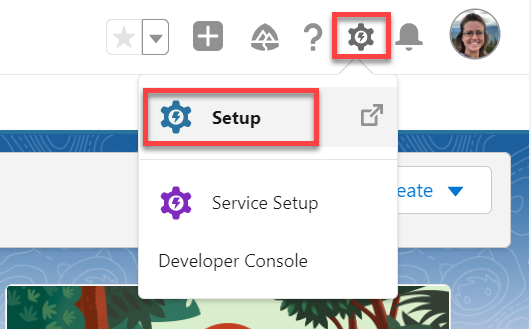 1. Click on the Gear ⚙ icon and select Setup
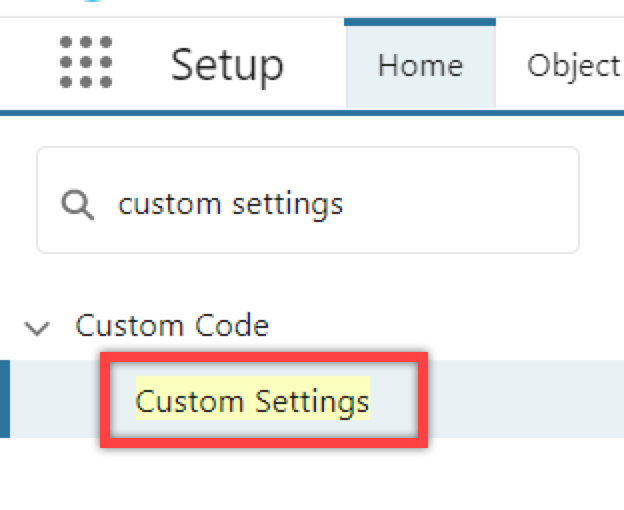 2. In the Quick Find box in the left-hand sidebar, enter Custom Settings to quickly find the necessary setting
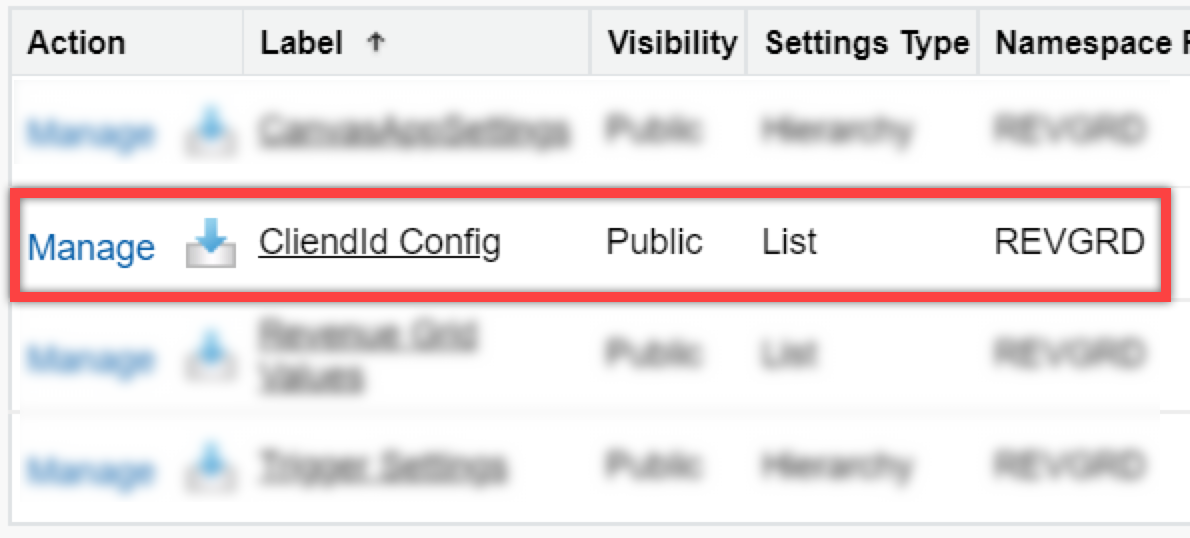 3. On the opened page, find the CliendId Config setting
4. Click Manage next to it
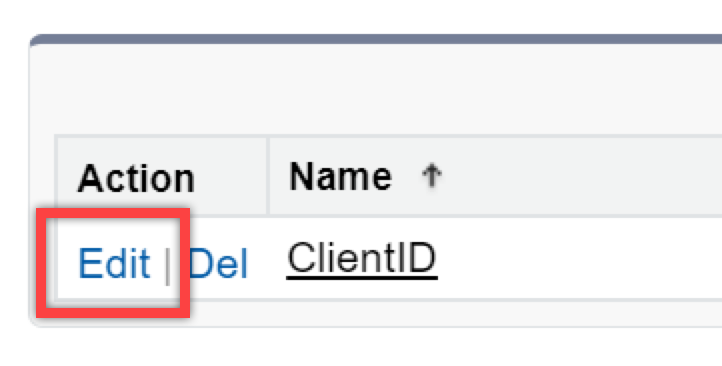 5. On the CliendId Config page, click Edit
![]() 6. Copy and paste the ClientId numeric value obtained from RG support team in the corresponding field.
6. Copy and paste the ClientId numeric value obtained from RG support team in the corresponding field.
7. Click Save to apply the changes
Connect Revenue Grid to your Salesforce configuration
Note
For performing this step, request “ServerSyncTenantUrl” from RG support team in advance or generate it on your own following the instructions provided in this article
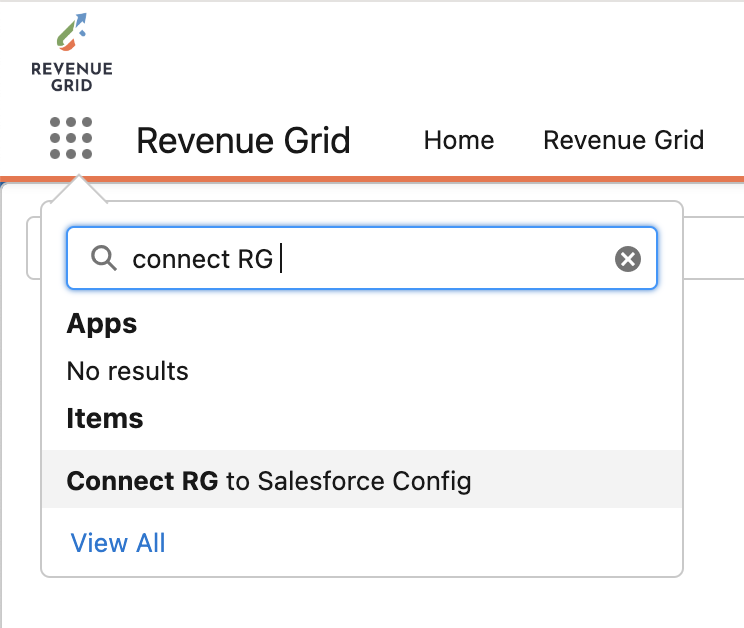 1. Go to App Launcher
2. Enter "Connect to RG" in the Search field
3. On the page that is opened, in the “Enter your tenant URL here...” field, enter the ServerSyncTenantUrl provided by our support team

Note
ServerSyncTenantUrl should follow this pattern: https://[ your tenant ]-sync.revenuegrid.com/ .
If you do not know your ServerSyncTenantUrl, you can either request it from RG support team or generate it on your own following the guidelines in this Revenue Grid instruction
4. Click Connect.
5. Next, you will see a standard Salesforce OAuth window
6. Log in to it with Salesforce credentials to authorize data access for integration
After connecting Revenue Grid to your Salesforce configuration, instant sync of calendar items from Salesforce to MS Outlook should function as expected.
Refresh RG connection to Salesforce config
In the default configuration of instant sync, the refresh token for this feature expires in 30 days after the connection. Thus, the admins shoud re-connect RG to Salesforce config every 30 days.
Tip
If your Org requires, the refresh token expiration period can be prolonged. To find out more about this option, sending a corresponding request to the RG support team
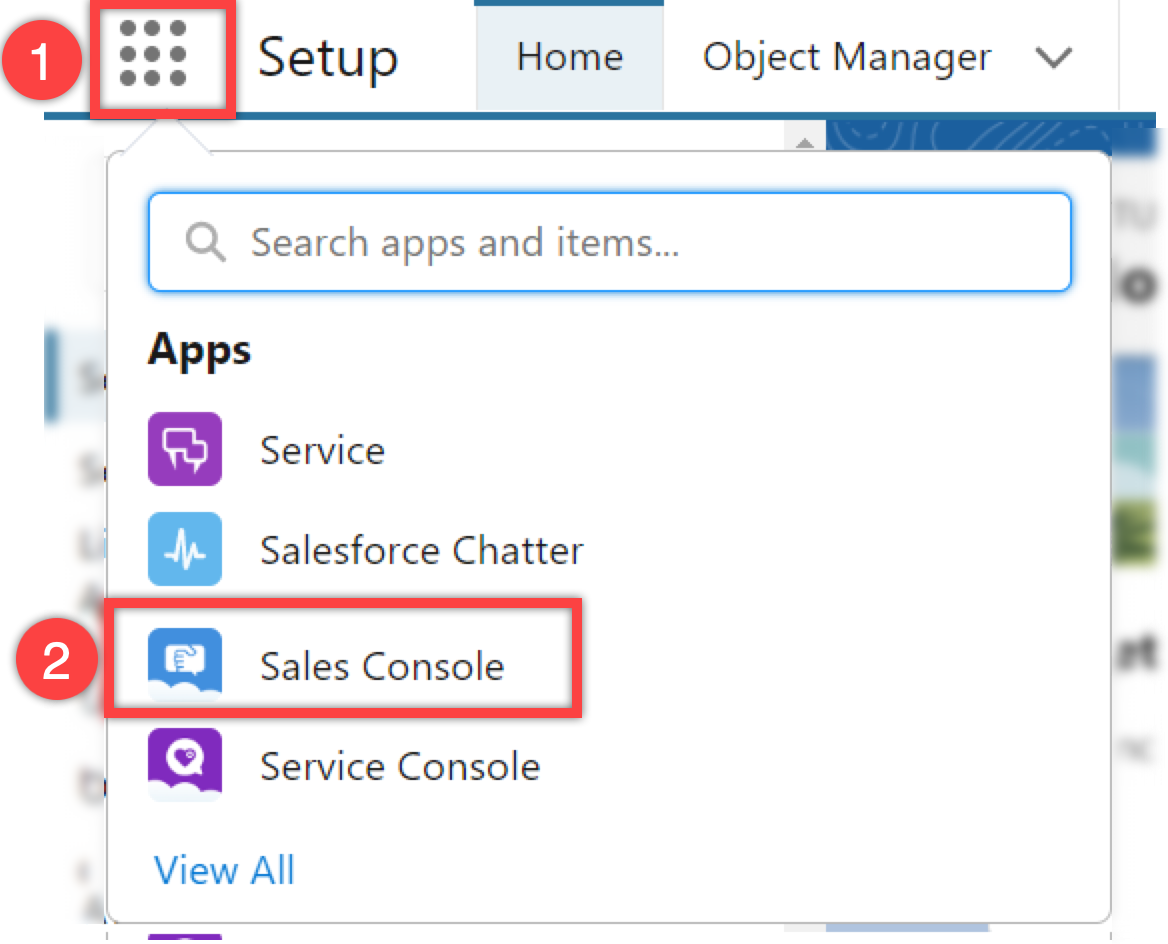
1. Go to App Launcher
2. Switch to Sales Console
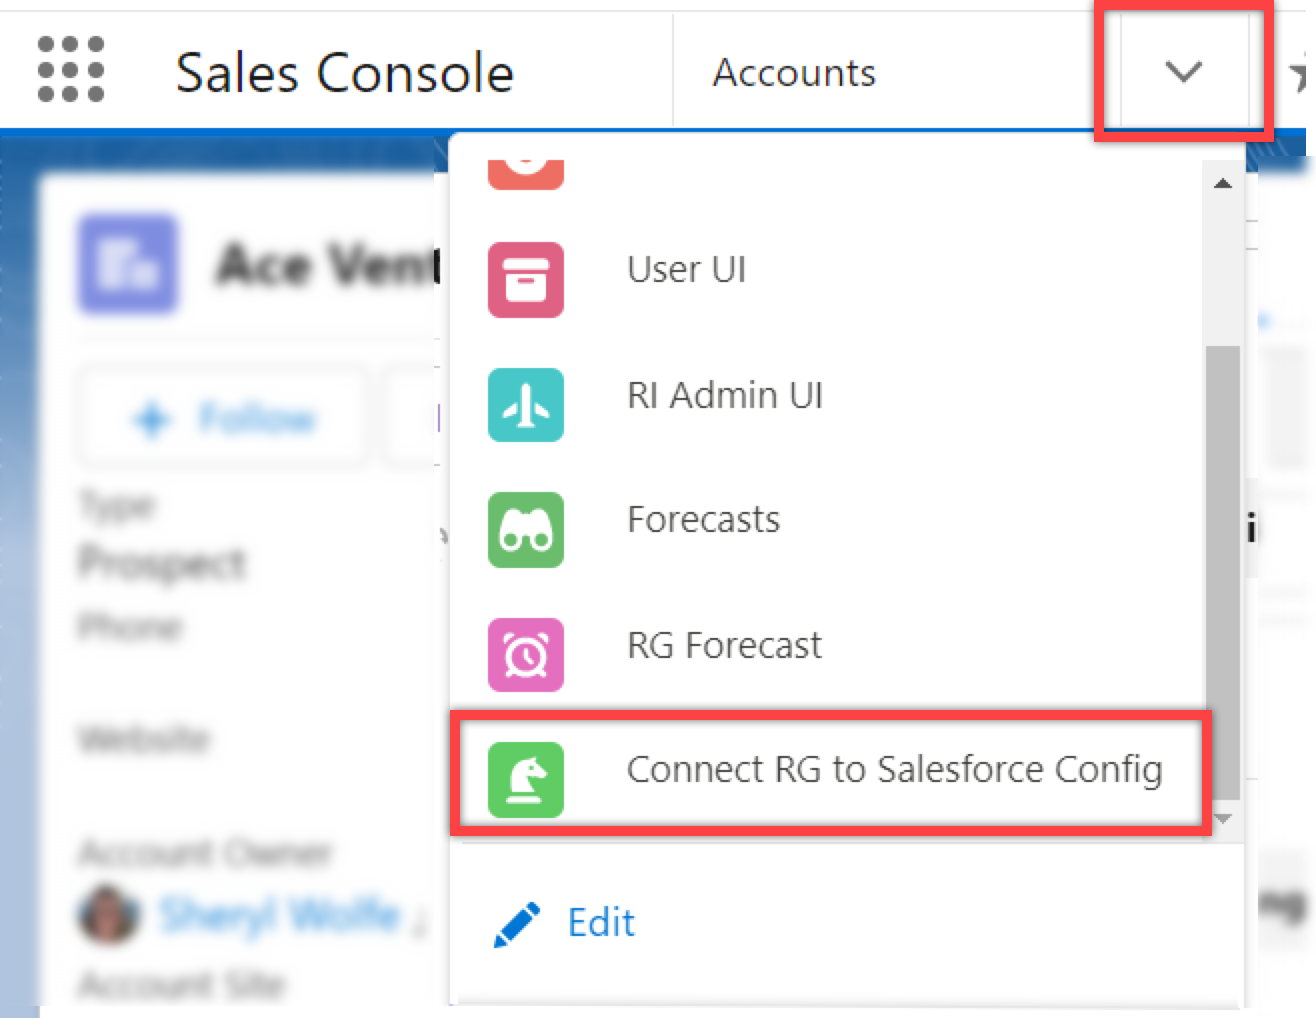 3. Open the Navigation menu and select the option Connect RG to Salesforce Config
If you see no option Connect RG to Salesforce Config on the Navigation menu list refer to the instructions provided below.
4. In the next window that opens, click Disconnect

5. You will see the green Disconnected status pop-up
6. In the “Enter your tenant URL here...” field, enter the ServerSyncTenantUrl
Note
ServerSyncTenantUrl should follow this pattern: https://[ your tenant ]-sync.revenuegrid.com/ .
If you do not know your ServerSyncTenantUrl, you can either request it from RG support team or generate it on your own following the guidelines in this Revenue Grid instruction
7. Click Connect.
8. Next, you will see a standard Salesforce OAuth window
9. Log in to it with Salesforce credentials to authorize data access for integration
Important
It may require several attempts to authorize it due to the technical peculiarities of Salesforce API authorization functioning; you may sometimes see an error “OAuth Error: We can’t authorize you … OAUTH_APPROVAL_ERROR_GENERIC”, please disregard it and continue login attempts until you see the green confirmation message “Connected”. Also, it’s possible that you will successfully sign in with Salesforce but won’t see the the green confirmation message “Connected”. In this case, click Connect again and repeat login attempts until you see the green confirmation message “Connected”.
After connecting Revenue Grid to your Salesforce configuration, instant sync of calendar items from Salesforce to MS Outlook should function as expected.
Important
Note that after enabling the instant sync, it takes up to one (1) hour for the system to start detecting the changes. This means that the events updated, created, or deleted within one hour from enabling instant sync may not be synced instantly.
Instant sync fine-tuning
By default, instant sync is triggered whenever an event is created, updated or deleted. However, you can limit instant sync triggering and disable its activation on event creation or deletion.
Learn how to fine-tune instant sync triggering…

We would love to hear from you!